Welcome to Sanctumel. In about fifteen minutes, your church is ready: account created, team invited, first members recorded. This guide walks you through it step by step.
Note: there's nothing to install. Sanctumel runs in the browser, on computer and phone alike.
1. Create your church
When you sign up, you enter your church's name, its country and its logo. The country matters: it sets the currency used everywhere (giving, receipts, statistics) and the payment methods available for giving. The Sanctumel subscription itself is paid in euros, everywhere in the world.
- Create your account with your email.
- Name your church and choose the country.
- Add the logo (it appears on documents, receipts and public pages).
Tip: get the logo right from the start. It's reused on donation receipts, certificates, the church's public page and QR codes.
2. Invite your team
You're not alone in running the church. Invite your leaders and give each the right role: administrator, treasurer, members manager, and so on. Each role only sees what concerns it.
- Open Settings, then Users and roles.
- Invite a leader by email.
- Choose their role: they'll get a link to join the workspace.
Warning: the treasurer role grants access to finances and giving. Only assign it to trusted people in charge of accounting.
3. Record your first members
The Members module is the foundation for everything else. Start with a few records, then import the rest.
- Open Members, then Add a member.
- Enter at least the first and last name.
- Add a photo and the date of birth to activate the birthday calendar.
To go faster, you can also import a full list from an Excel file.
Getting around the Suite
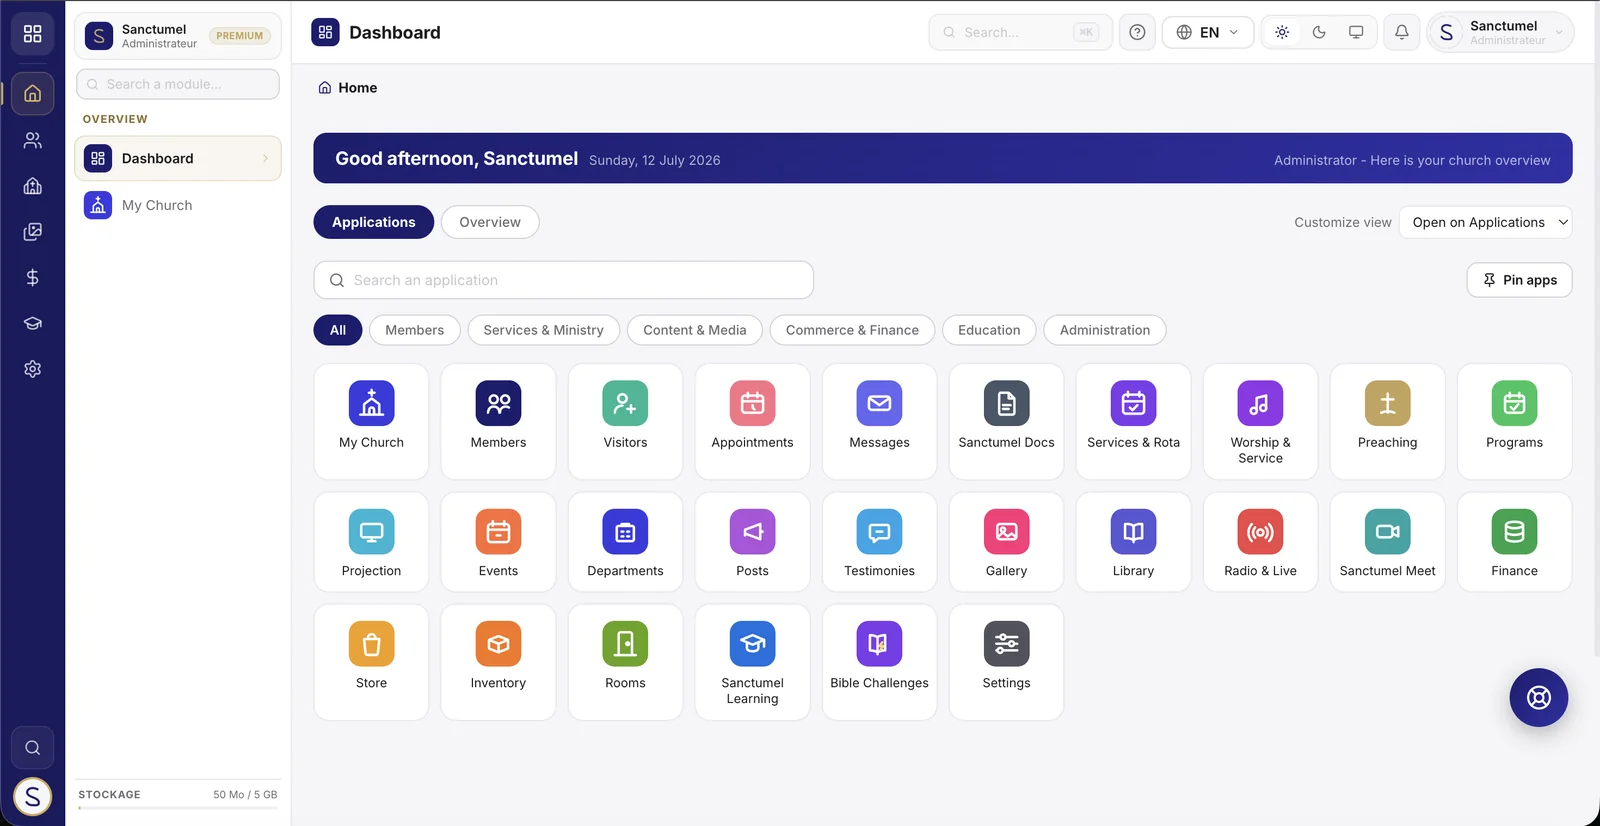
Navigation works like an app launcher:
- The spine (the slim column on the left) shows your sections as icons. Hover an icon to preview its modules in the panel; click to keep it open.
- The contextual panel lists the modules of the hovered section; on a module with sub-pages (Finance, Members...), it lists those sub-pages directly.
- The launcher (grid icon at the very top) gathers your favorite applications - pin the ones you use daily - plus your Suite, Pay and Community spaces.
- The home page is an application dashboard: search, filter by category, launch. Pastors and administrators also get an Overview tab with the church's figures, and can pick their default tab via "Customize view".
- On a phone, a bar at the bottom of the screen gives access to home, your main sections and the full menu.
Tip: the global search (magnifier in the spine, or Ctrl+K / Cmd+K) finds a module, a member or an action in a few letters.
What's next?
Once these three steps are done, you can turn on the features that matter to your church:
- Receive donations online (QR code, public link, automatic receipts).
- Plan your events and publish your program.
- Communicate with your members by email and WhatsApp.
Each module has its own guide in this documentation. If you get stuck, the help center and our team reply in your language.